The Prettiest Pie
Somehow, suddenly, pie season is here! Are you ready for it?
If you’ve ever wanted to be the proud producer of one of those beautiful pies with an intricately-woven lattice pie crust, today I’m going to show you exactly how it’s done. Step-by-step. With more pictures and more words than you probably need.
You will need a good pie dough for this recipe, so if you haven’t already I strongly recommend you make yourself a batch of my super easy, all-time favorite homemade pie crust.
It’s about time that you have the prettiest pie on the dessert table, don’t you think? Let’s get to it!
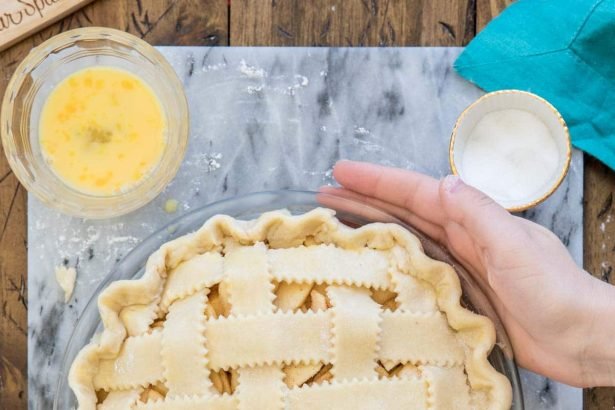
How to Weave Pie Crust into a Lattice Design
All of these steps are detailed in the printable instructions below, but let’s go over them in detail here. Each numbered photo in the collage above corresponds with the numbered instruction below:
- Roll your pie dough into a 12″ circle and cut into 1″ strips.
- Space 5 strips horizontally across the pie.
- Fold back strips 1, 3, and 5 and lay a single long strip of dough vertically across the center of the pie.
- Cross strips 1, 3, and 5 over the vertical strip and now fold back strips 2 and 4 and space a second vertical strip near the first.
- Cross strips 2 and 4 over the new strip, fold back 1, 3, and 5 again and evenly space a third strip vertically near the rim of the pie plate.
- Cross the folded strips over the last vertical strip, and now move to the other half of your pie, twice repeating the steps above for your other half of the pie (you will have 5 horizontal and 5 vertical strips total).
- Great job! You’ve woven all of your pie strips and should have a beautiful lattice pattern. Now trim the any strips that are hanging over the edge of your pie plate so that they end at the edge of the plate.
- Fold the bottom crust over the strips.
- You’re finished! If desired, flute the pie crust, or you can just crimp the edges with the tines of a fork.